How to Troubleshoot Refrigerator Defrost Issues
Learn how to troubleshoot refrigerator defrost failures with safe tests for heaters, thermistors, timers, and control boards - plus a technician workflow.
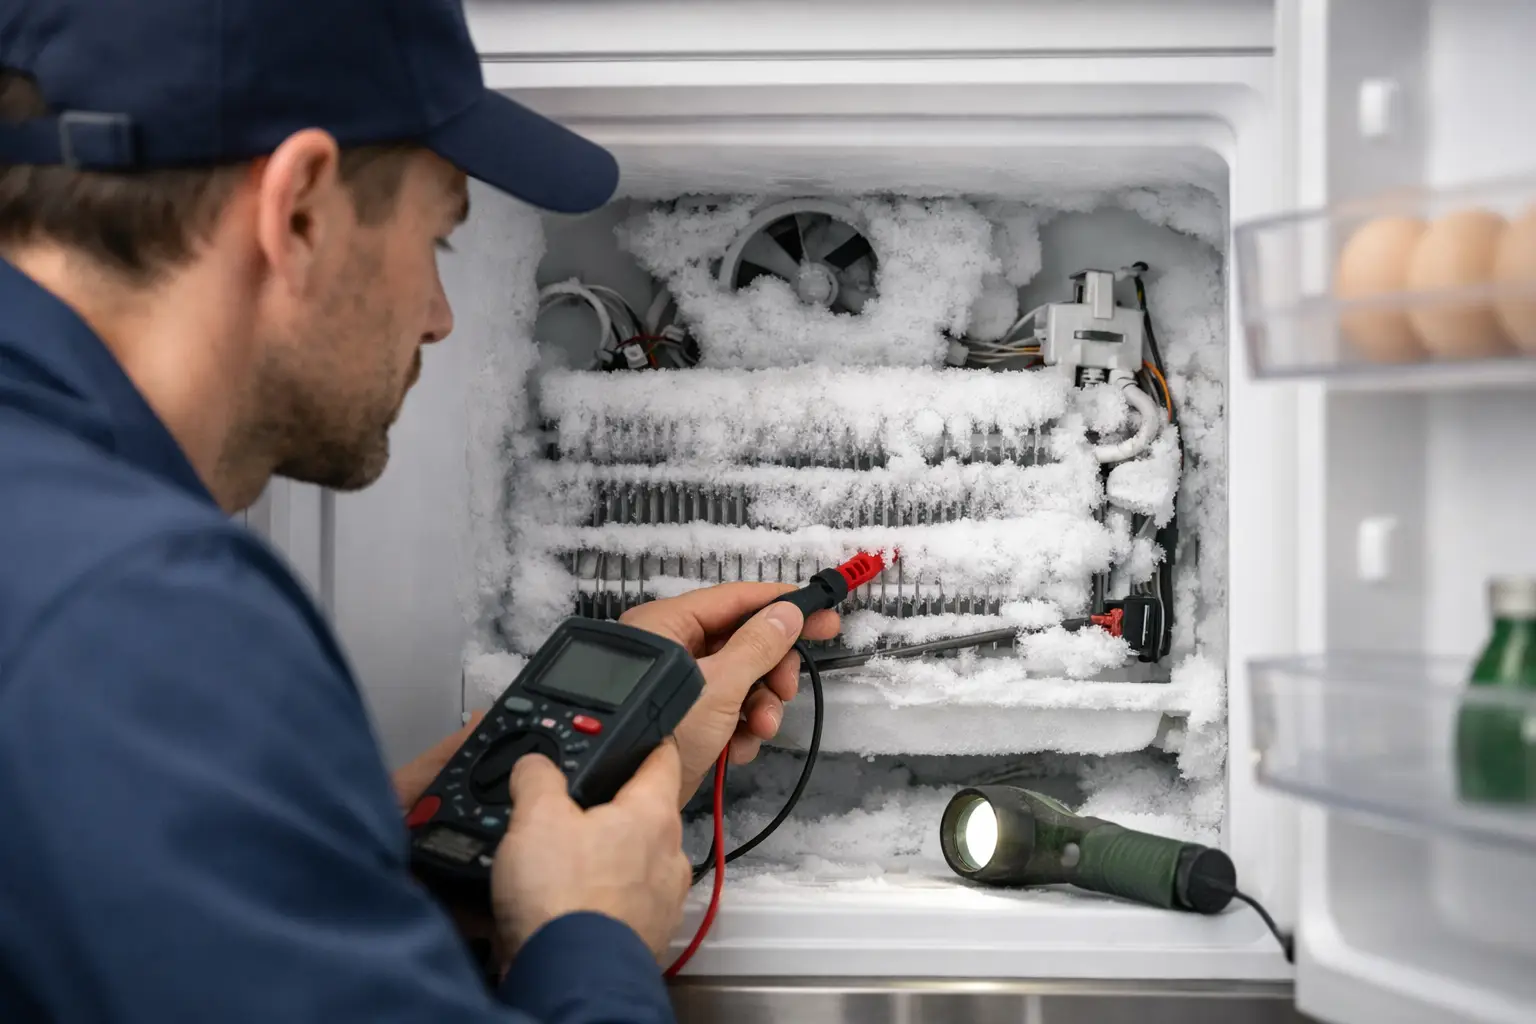
A refrigerator can be cooling normally one week and then show up with a freezer wall packed in snow, a weak fresh-food section, and an evaporator fan struggling behind ice. Learning how to troubleshoot refrigerator defrost problems is where a parts-changer becomes a technician. The goal is not to guess whether the heater, sensor, timer, or board failed. The goal is to prove where the defrost circuit stopped doing its job.
For a new technician, this is also a high-value diagnostic skill. Defrost failures are common service calls, but the root cause varies by platform. A mechanical defrost timer, adaptive defrost control board, thermistor, bimetal thermostat, heater, door gasket leak, or blocked drain can create symptoms that look similar from the kitchen floor.
Start With the Defrost Failure Pattern
A true defrost failure usually creates a heavy, even frost pattern over the evaporator coil in the freezer compartment. Air cannot move through that ice efficiently. The freezer may remain partially cold while the fresh-food section warms because the evaporator fan cannot deliver enough cold air through the damper and air channels.
Do not confuse this with a sealed system issue. A sealed system problem typically produces a weak or incomplete frost pattern, often limited to the first few passes of the evaporator. A defrost failure produces an evaporator buried under white frost or solid ice after the unit has run for days or weeks.
Before removing panels, ask the customer when the issue started, whether they noticed water on the floor, and whether doors have been left open. Then verify door closure, inspect the gasket for tears or gaps, and look for food packages preventing a full seal. Warm, humid air entering through a bad door seal can overload an otherwise functional defrost system.
Safety Before Refrigerator Defrost Troubleshooting
Disconnect power before accessing wiring, removing the evaporator cover, or testing resistance. Use lockout/tagout practices when working in a shop or on a job where another person could restore power. Wear cut-resistant gloves because evaporator covers and sheet-metal edges can be sharp.
If the evaporator is encased in ice, do not attack it with a knife, screwdriver, heat gun, or open flame. A punctured evaporator turns a routine electrical diagnosis into a sealed system repair. Use controlled warm air, towels, and time. Keep water away from electrical connectors and document wire locations before disconnecting components.
How to Troubleshoot Refrigerator Defrost Components
The exact circuit depends on the model, so use the wiring diagram stored in the machine compartment or service literature whenever possible. Still, the diagnostic sequence remains consistent: inspect the frost pattern, expose the evaporator, identify the defrost components, test the heater circuit, then determine whether the control is initiating defrost.
Inspect the evaporator and drain system
Remove the freezer shelving, bins, and evaporator cover. Photograph the ice pattern before thawing it. This photo can support your diagnosis and make customer documentation more credible.
Look for a blocked drain trough beneath the coil. A plugged drain can freeze into a large ice mass, cause water leaks, and eventually interfere with airflow. Clear it with warm water after the unit is unplugged. A drain issue may exist alongside a failed defrost component, so do not stop the diagnosis just because you found ice in the drain pan area.
Test the defrost heater
The defrost heater is commonly mounted below, around, or through the evaporator coil. With power disconnected and heater leads isolated as required by the wiring diagram, set the multimeter to resistance. A functioning heater usually shows continuity and a measurable resistance value. An open reading, often displayed as OL, indicates a failed heater.
Do not rely on a generic resistance specification without checking the model information. Heater wattage and resistance vary. What matters first is whether the circuit is open or intact, followed by whether its measured value is reasonable for that component.
Also inspect heater terminals for burned connectors, loose pins, or corrosion. A good heater cannot operate through a damaged connection.
Check the defrost thermostat or bimetal
Many refrigerators use a defrost thermostat, also called a bimetal, clipped to the evaporator tubing. It closes when the coil is cold and opens as coil temperature rises, limiting heater operation. Because it is temperature-sensitive, testing it warm on a workbench can produce a misleading open reading.
For a valid continuity test, the bimetal must be cold enough to close. Place it in an ice-water bath or test it while it is still cold on the evaporator, following the model's expected operating temperature. If it remains open when properly chilled, replace it. If it closes cold and opens as it warms, it may be operating correctly.
Some newer platforms replace the bimetal with a thermistor and electronic control logic. In that case, measure thermistor resistance and compare it with the manufacturer temperature-resistance chart. Thermistor diagnostics require precision. A sensor that is only slightly out of range can send bad temperature information to the control board and shorten, delay, or cancel defrost cycles.
Determine whether the control initiates defrost
Older refrigerators may use a mechanical defrost timer. Depending on the design, you can manually advance the timer into defrost and listen for the compressor and evaporator fan to shut down. Then check whether power is being delivered to the heater circuit. If the heater and safety thermostat are good but the timer does not advance or send voltage in defrost, the timer is the likely failure.
Newer units often use adaptive defrost control logic on the main board. These boards calculate defrost timing from door openings, compressor run time, and temperature inputs. Many models include a forced-defrost procedure through the display panel, door switches, or service mode. Follow the model-specific procedure exactly.
During forced defrost, measure voltage at the heater circuit only when the wiring diagram confirms where and when voltage should be present. If the control commands defrost but does not provide the required voltage through an otherwise intact heater circuit, the board or its harness may be at fault. If voltage is present but the heater does not warm, return to the heater, thermostat, and connection tests.
Avoid the Most Expensive Diagnostic Mistakes
The biggest mistake is replacing a control board before checking a $30 heater, bimetal, connector, or broken wire. Boards are expensive, often nonreturnable once installed, and frequently blamed because they are harder to test. Earn the board diagnosis by proving the load circuit and sensor inputs first.
Another mistake is diagnosing immediately after manually thawing the unit. Once the ice is gone, the refrigerator may cool normally for several days. That does not prove the repair. A technician should explain that a defrost-cycle problem can take time to reappear, then document the readings and component condition that supported the repair decision.
Finally, do not overlook airflow. Verify that the evaporator fan runs when the door switch is closed, that air passages are open, and that the damper assembly is not stuck. A failed fan can create warm-food symptoms without being the original defrost problem.
Use a Repeatable Field Workflow
A professional refrigerator call needs more than a repaired appliance. It needs a clear workflow: confirm the complaint, photograph the frost pattern, disconnect power, test the circuit in sequence, install only proven parts, verify operation, and write a customer-ready report. That process protects your labor margin and gives customers confidence that you solved the cause rather than temporarily melted the ice.
This is the kind of structured diagnostic thinking technicians build through scenario-based training. Appliance Repair Academy teaches electrical testing, refrigeration fundamentals, customer documentation, and real fault isolation so students can move from basic calls to paid diagnostic work with more confidence.
When you can explain why an evaporator froze, what reading proved the failed component, and what the customer should watch after the repair, you are building more than technical skill. You are building the reputation that leads to repeat calls, referrals, and a service business customers trust. Explore more technician training content from Appliance Repair Academy and use the Appliance Repair Assistant AI app alongside hands-on diagnosis to organize readings, reference wiring information, and document the job.